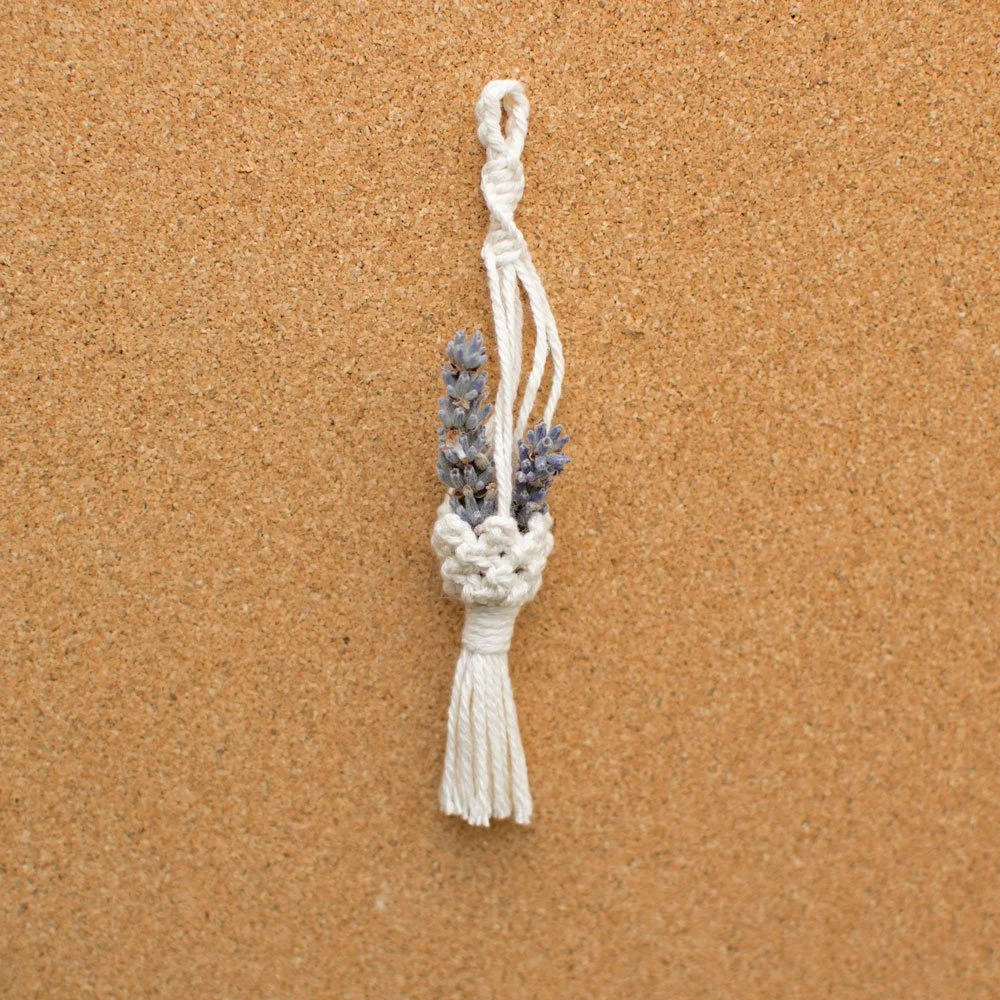
DIY Mini Macrame Car Charm (Tutorial)
If you’re keen to try working with finer macrame cord (1mm or 1.5mm), this mini project is a great place to start.
This design combines elements of basket and plant hanger styles to create a small, structured car charm that’s both detailed and versatile. While it looks intricate, it’s built using simple, repeated knots - making it approachable even if you’re fairly new to macrame.
You can follow along step-by-step using the video below and customise the finished piece however you like, whether that’s for your car, keys, or a small decorative accessory.
(Free cord calculator included further down if you’d like to plan your own variations.)
Using the kit?
Follow along step-by-step below with your pre-cut cord or watch the video for extra guidance.
Making your own?
You’ll find the full materials list and measurements just below.
What you’ll need
1.5mm cotton cord (approx. 6m) - you can adjust this using the cord calculator below.
Measuring Tape / Ruler
Fabric Scissors
Faux Greenery/Dried Flowers
0.25m elasticated string
Cork board and pins (optional)
This design works best with finer cord to create a more detailed, lightweight finish.
You can also customise the look by choosing different colours or adding your own element inside the hanger.
Before you start…
If you’re adjusting the size or experimenting with your own variations, you can use this macrame cord calculator to estimate your cord lengths more accurately.
Make the handle
Measure and cut the following lengths of cotton cord:
3x 0.6m
10x 0.35m
1x 0.4m
If you've purchased the kit, skip this step.
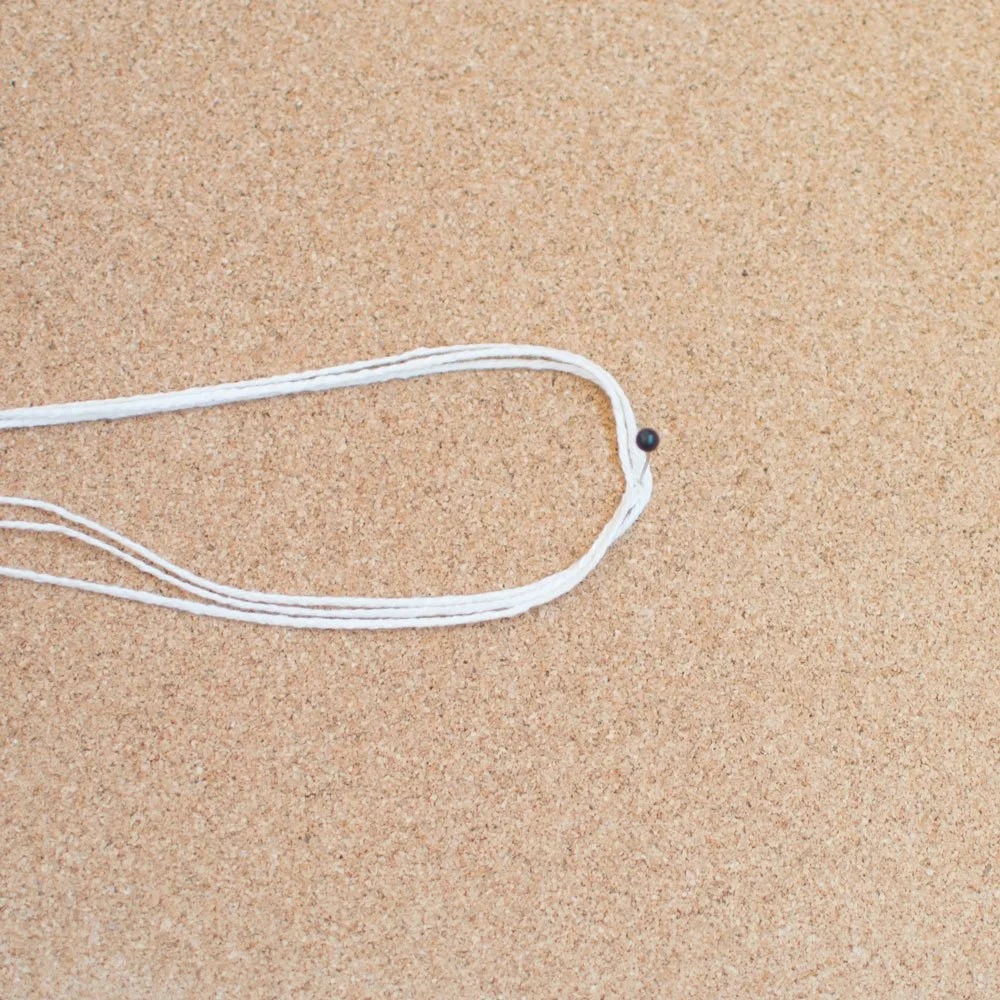
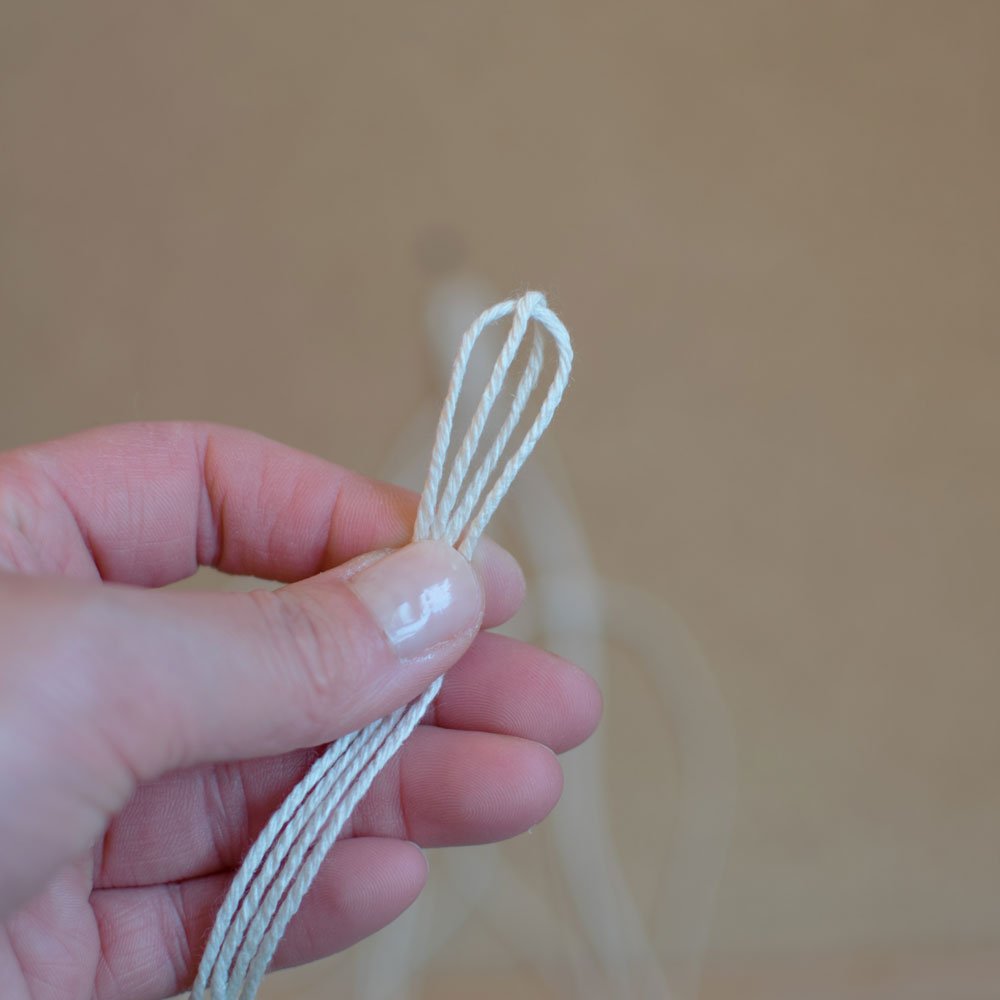
Take the 0.6m lengths and fold them all in half. Mark out the centre using a clip or pin it to a cork board.
Create the handle by making a braid from the middle. Repeat the braid about five times, then turn it around and do the same again to the other side of the marked middle.
This part is fiddly, so feel free to mark out each end if you need to.
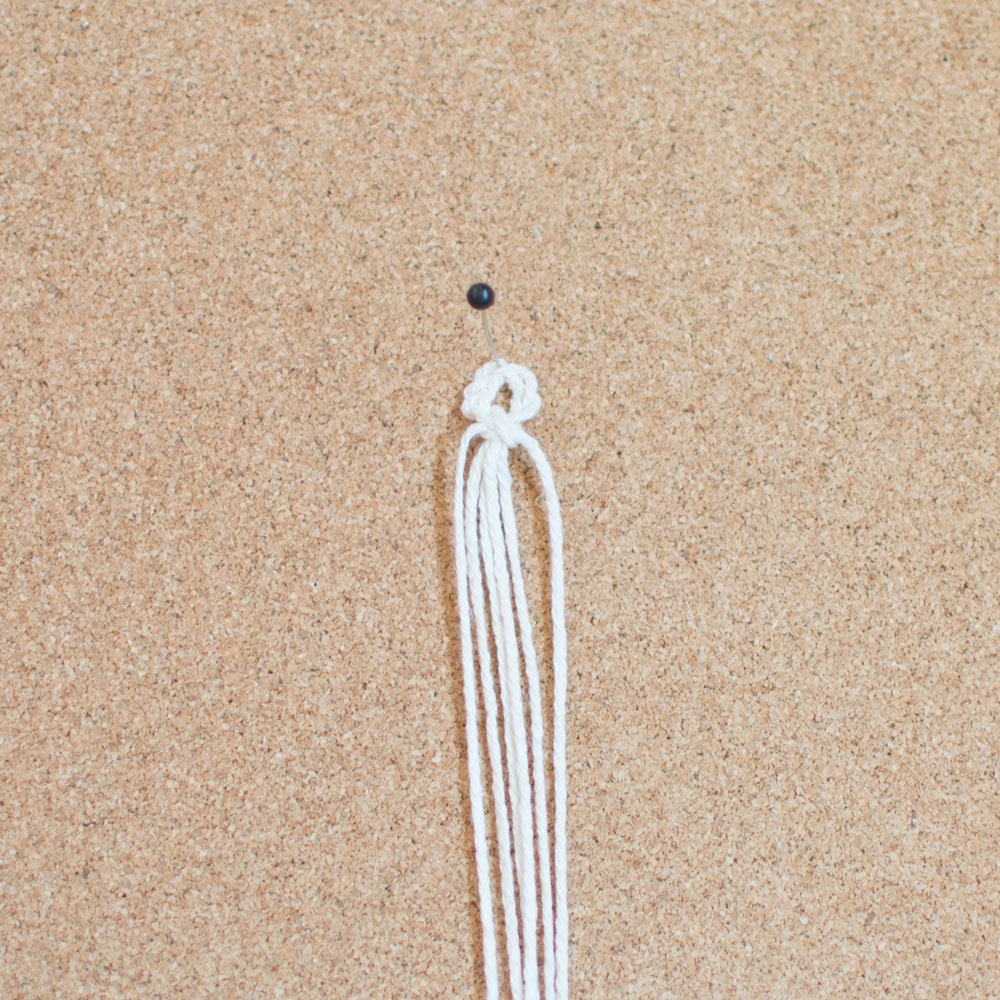
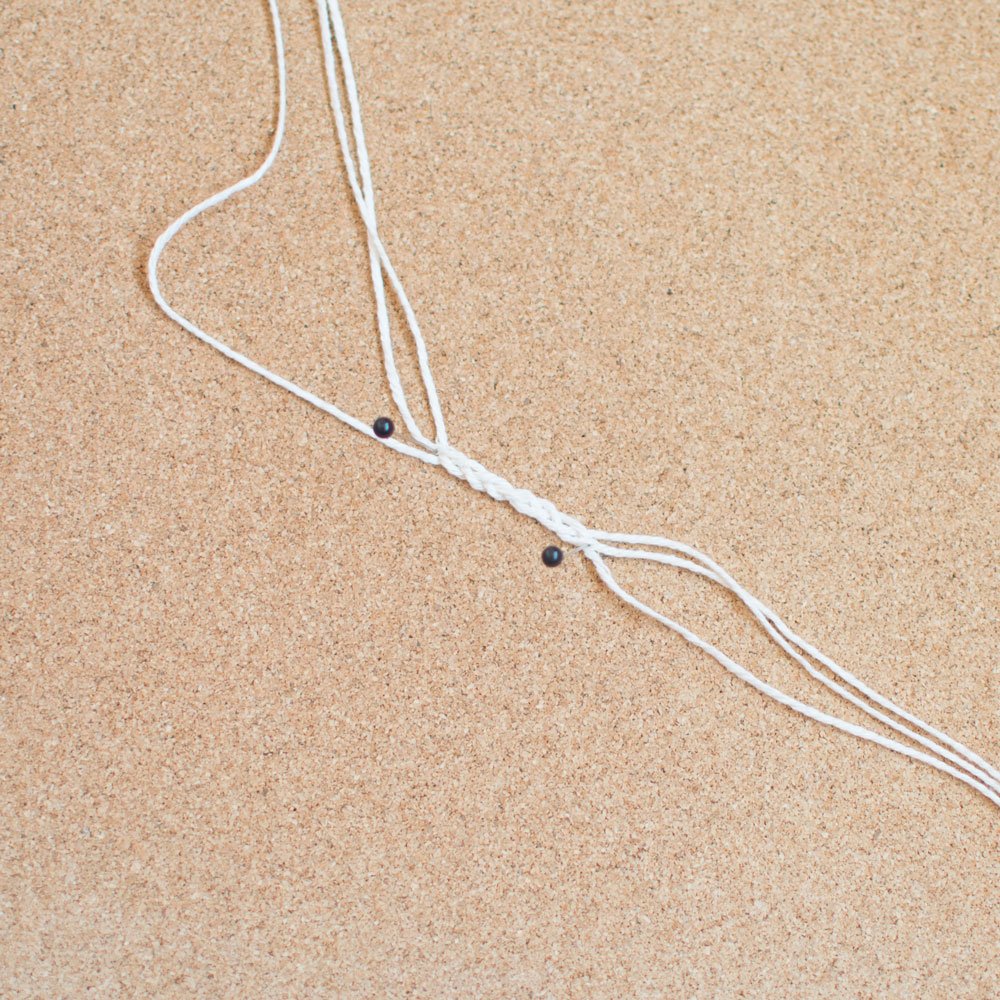
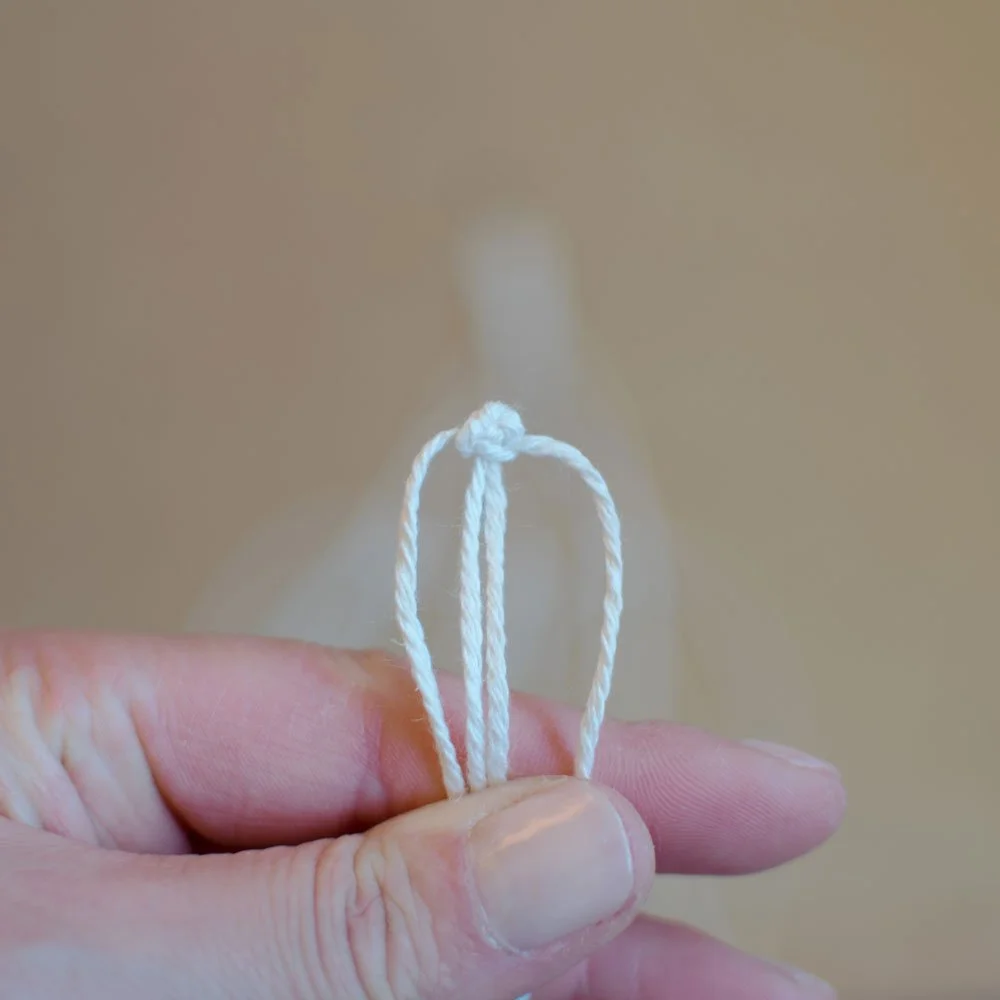
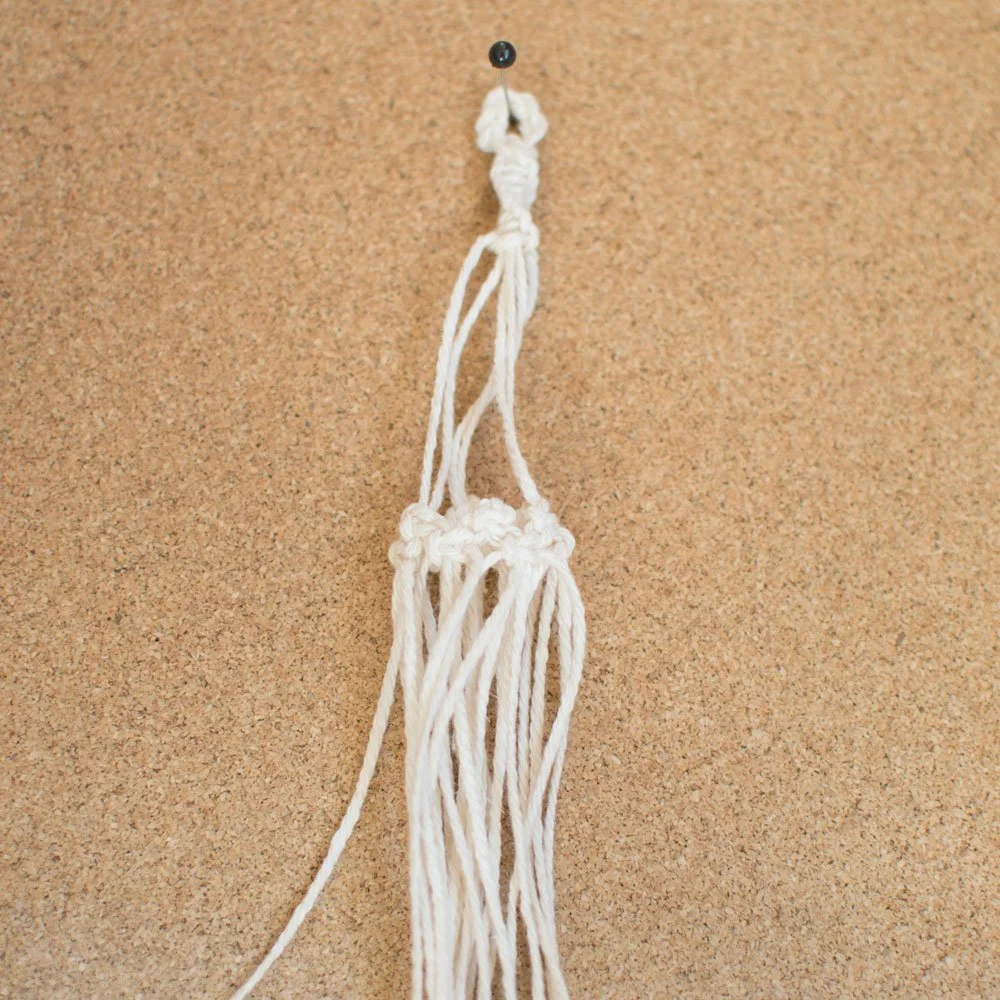
2. Create the Spiral
Fold the braided ends together and hold it in place with your finger.
You’re going to create half a square knot to close off the handle. Take a length from the left and one from the right - these are your outer cords. The ones in the middle are your inner cords. Fold the left outer cord over the inner cords (creating an ‘L’ shape).
Then take the right outer cord, fold it over the L shape, under the inner cords and through the L shape. Pull to tighten, do it slowly to get the first knot in position. You may need to pull the inner cord slightly to ensure the handle keeps its shape.
Repeat this knot again and tighten it to secure the handle in place.

Repeat the half square knot again, you will start to see the spiral pattern form.
Repeat this knot until the spiral pattern measures approximately 4.5cm.
3. Create your square knot lengths
Taking six of the 0.35m lengths, fold two of them in half and find the middle.
Fold one of the lengths over one another and use your fingers to hold this in place.
Create a square knot - do this by taking the left cord and forming an L shape over the two inner cords. Take the right cord, fold it over the L shape, under the inner cords and through the L shape. Pull to tighten.
Repeat this step using the right outer cord first.
Repeat the square knot with the other four 0.35m lengths, then set these aside as you will be attaching them to the hanger later
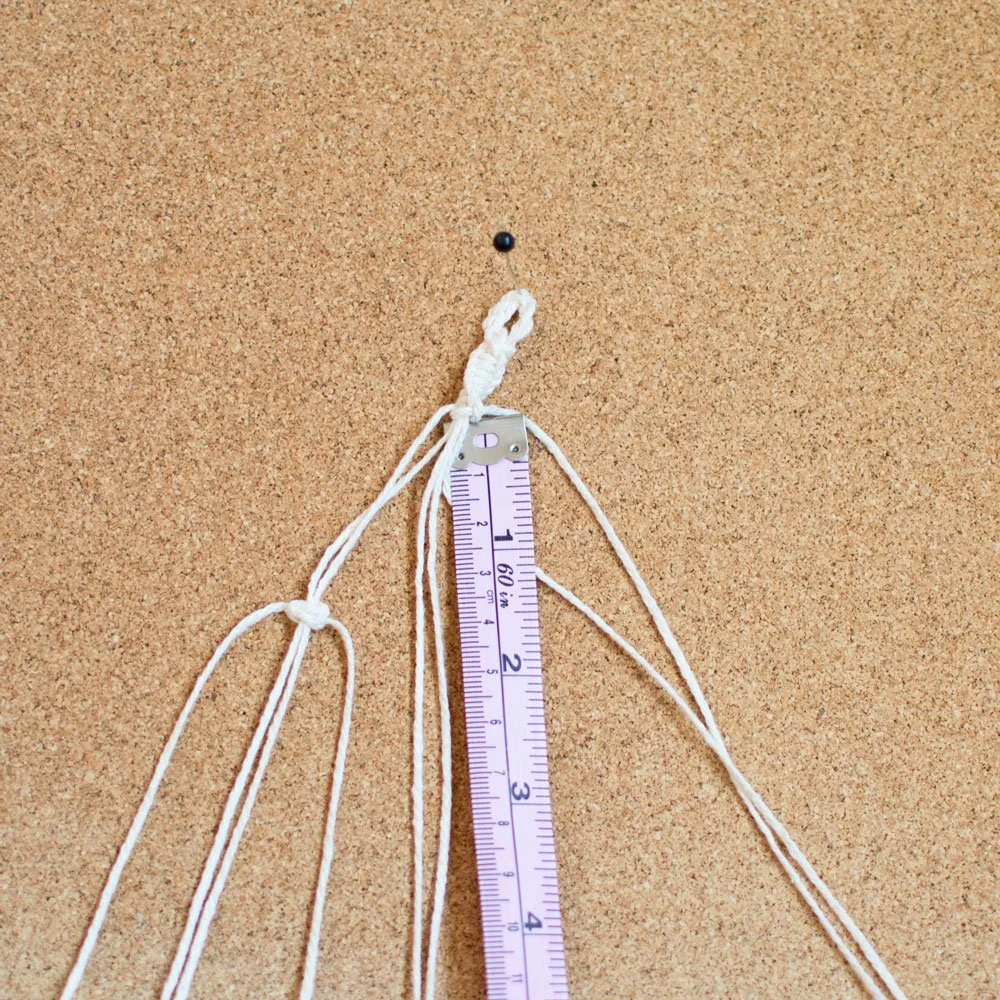
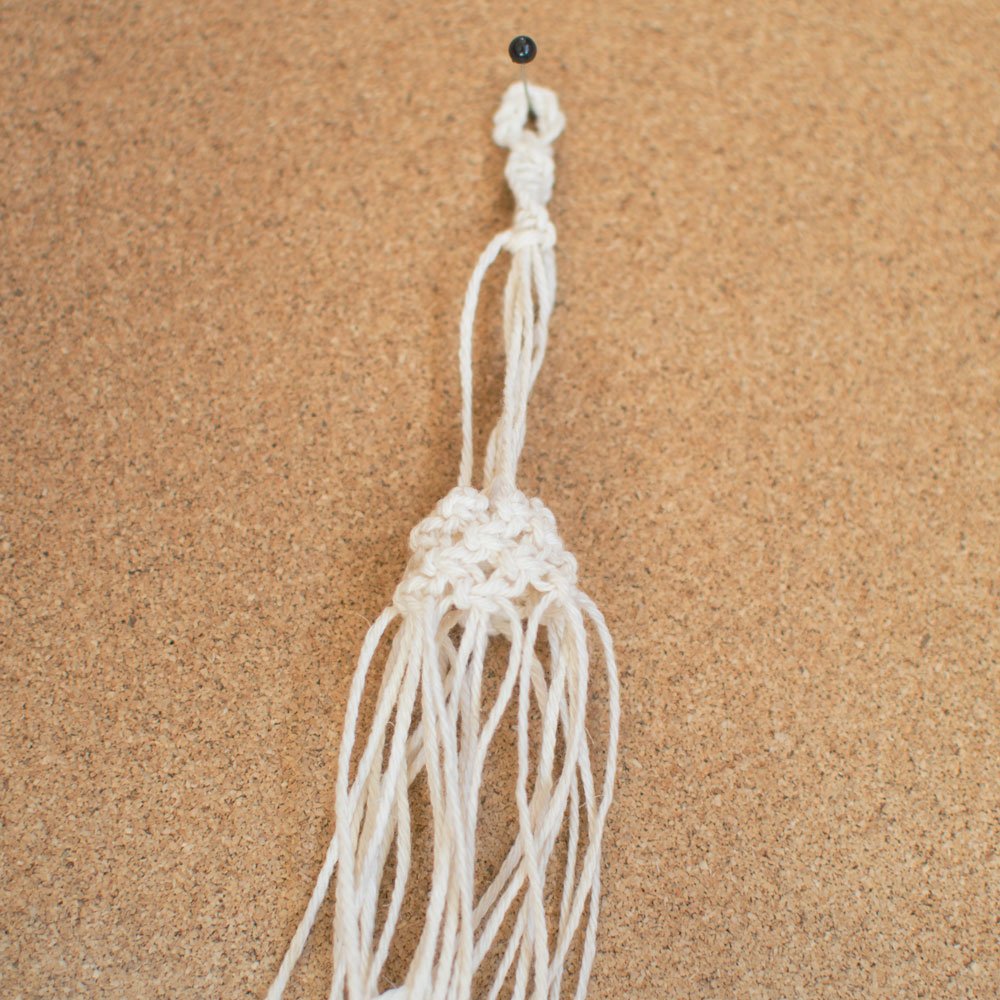
Divide the hanger into three sections and take three 0.35m lengths to form a square knot approximately 4.5cm from the spiral pattern.
The additional cords will be your outer cords and the divided sections are your inner cords.
Repeat this for all three lengths.
4. Attach the lengths
Now attach the square knot lengths that you made earlier onto the hanger.
Alternate where you place them, one on each side of the three sections.
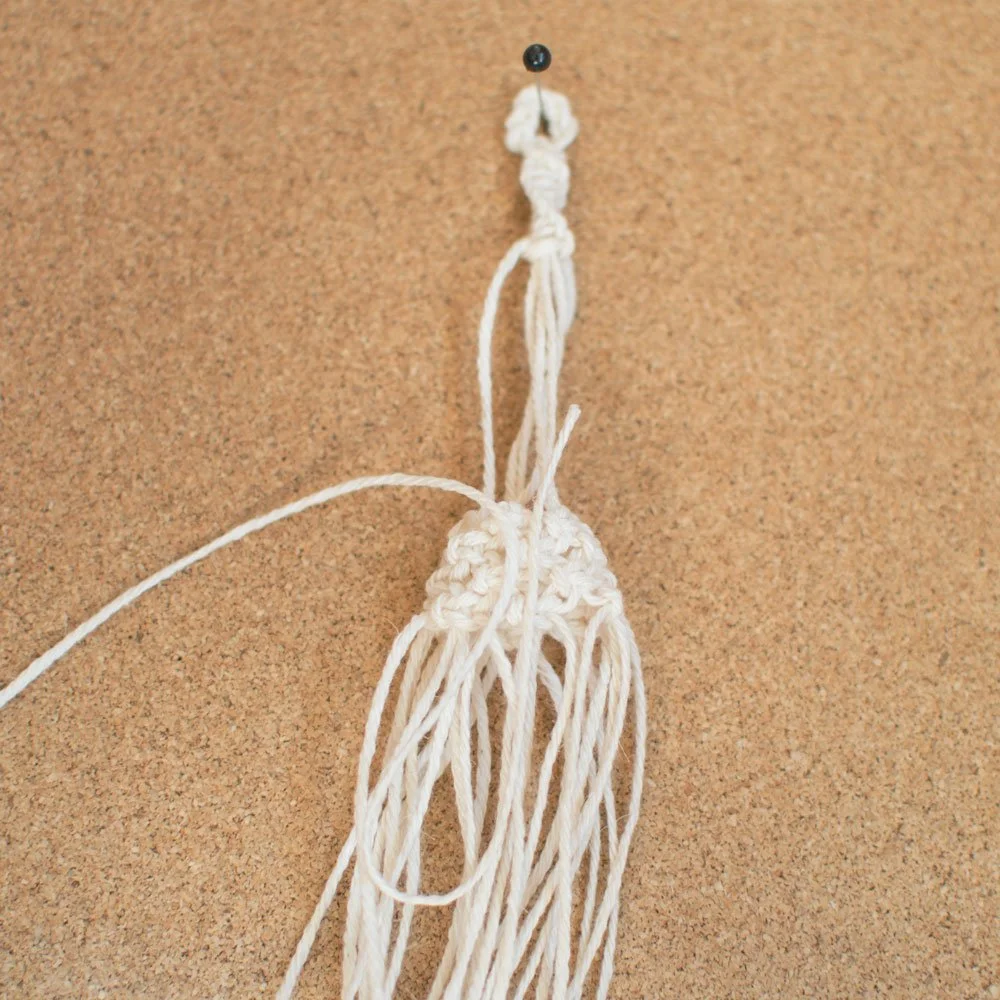
Attach them with a square knot using two lengths from each square knot length.
Then fold it around to attach the main section together with one more square knot.
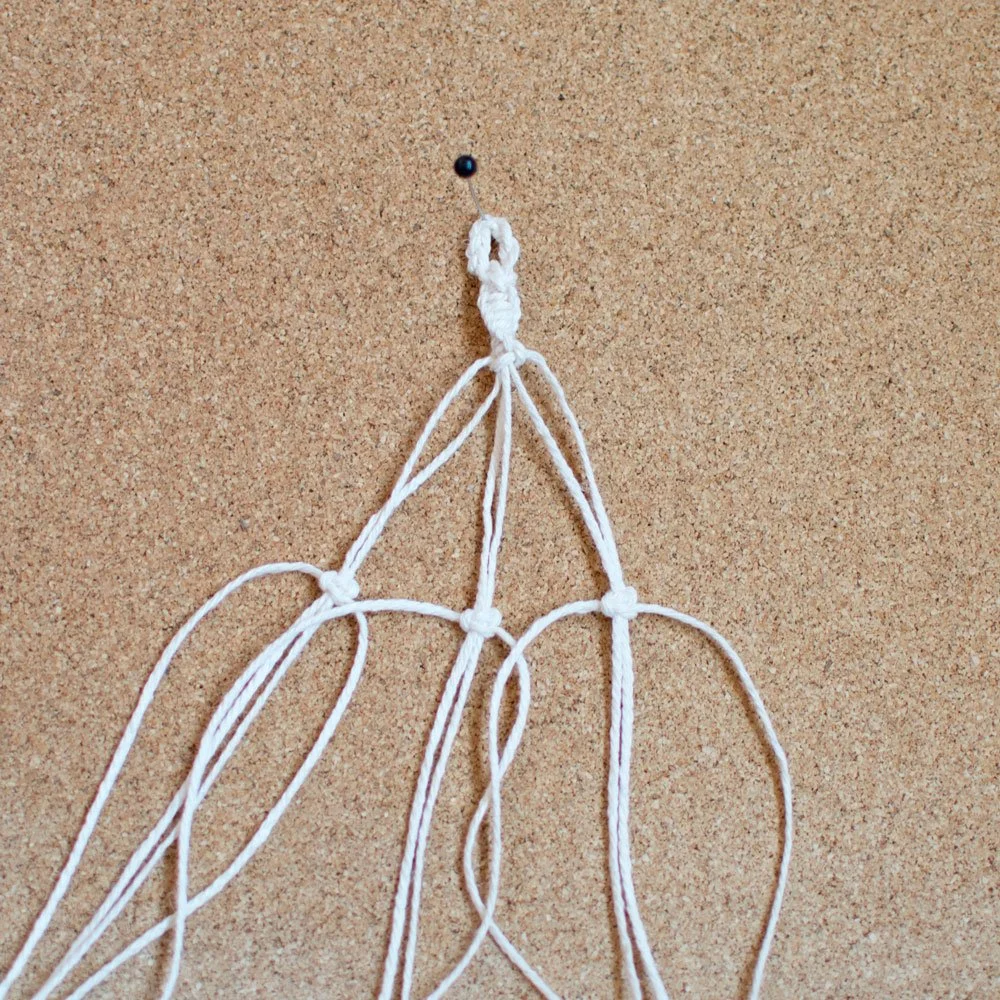
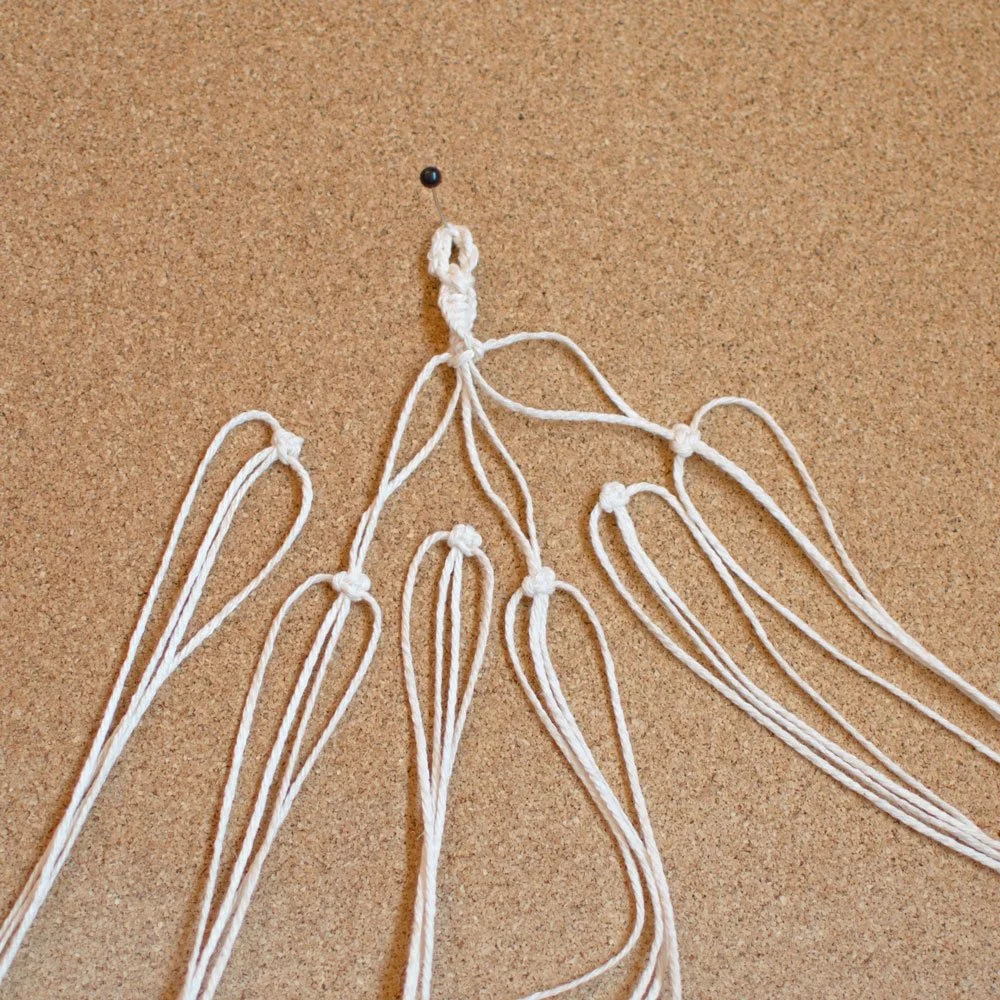
5. Create the basket base
Continue to create alternating square knots until you have 4 layers of square knots in total.
6. Tie it together to finish
Take your remaining 0.35m length and place the top part of the cord over the basket.
Create a loop that sits below the basket, then wrap the cord around the bottom of the basket 5 or 6 times, ensuring the loop is still visible. Then feed the cord through the loop.
Pull the top part of the cord until the knot sits behind the wrapped cord section.
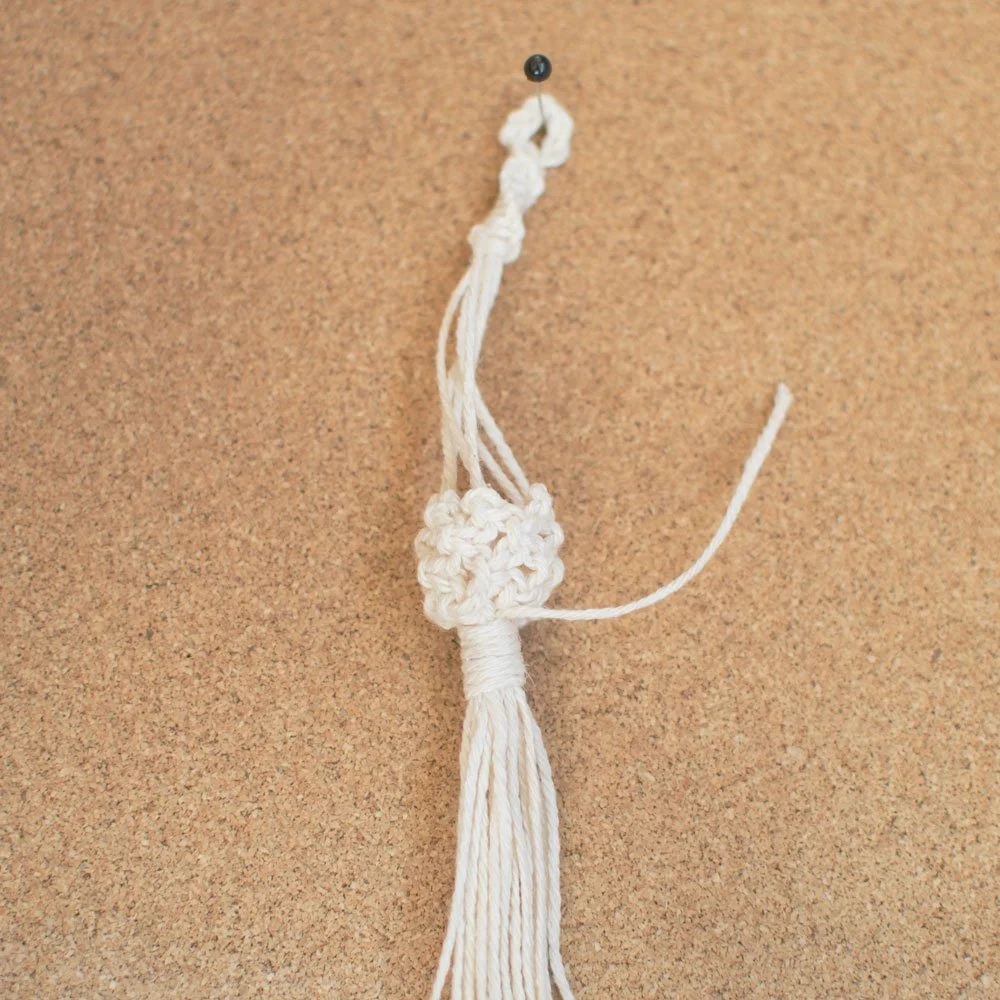
Use sharp scissors to cut the top section of the cord and then use them again to push down the cut cord so it hides in the wrapped section.

Cut the tassel section to your desired length.
7. Add your accessories
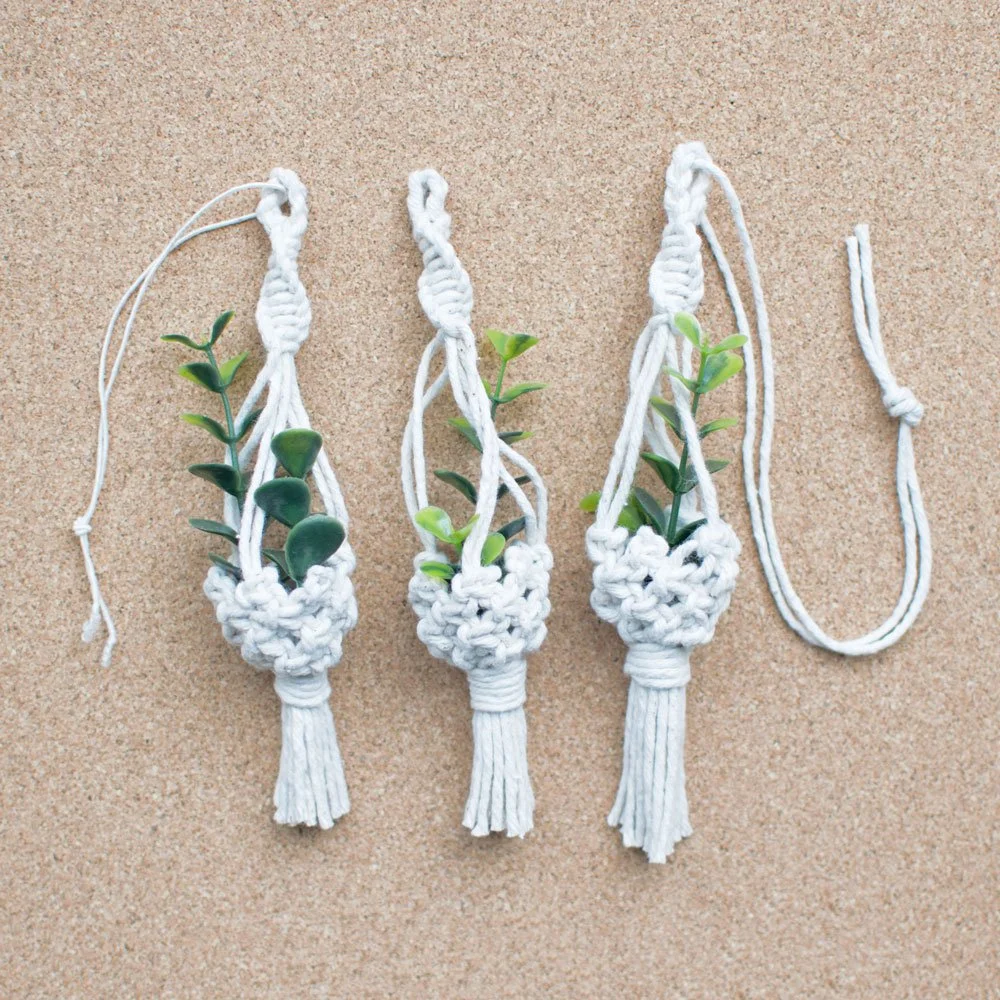
Finish it off with adding some faux eucalyptus or dried lavender sprigs into the basket.
You will need to position them properly so it holds in place.
Cut to size if need be.
8. Attach the handle
Using either the elasticated string or the 0.4m length of cotton cord, feed it through the handle loop and tie it together using an overhand knot.
This will be the handle that you use to tie it around the mirror.

Time to style your charm
Now it’s time to add your own finishing touch - whether that’s styling it in your car, attaching it to your keys, or gifting it to someone.
It’s a small project, but one that feels surprisingly satisfying once it comes together.
Want to make it bigger?
If you’d like to experiment with different sizes or try larger macrame projects, you can use my free macrame cord calculator to help plan your cord lengths.
It’s designed for standard cord sizes and is especially useful when scaling designs up or creating your own variations with thicker cord.
Don’t have the materials?
If you’d rather skip sourcing supplies and start straight away, I’ve put together a DIY kit with everything you need for this exact design.
Perfect for a quick, calm project you can come back to again and again.