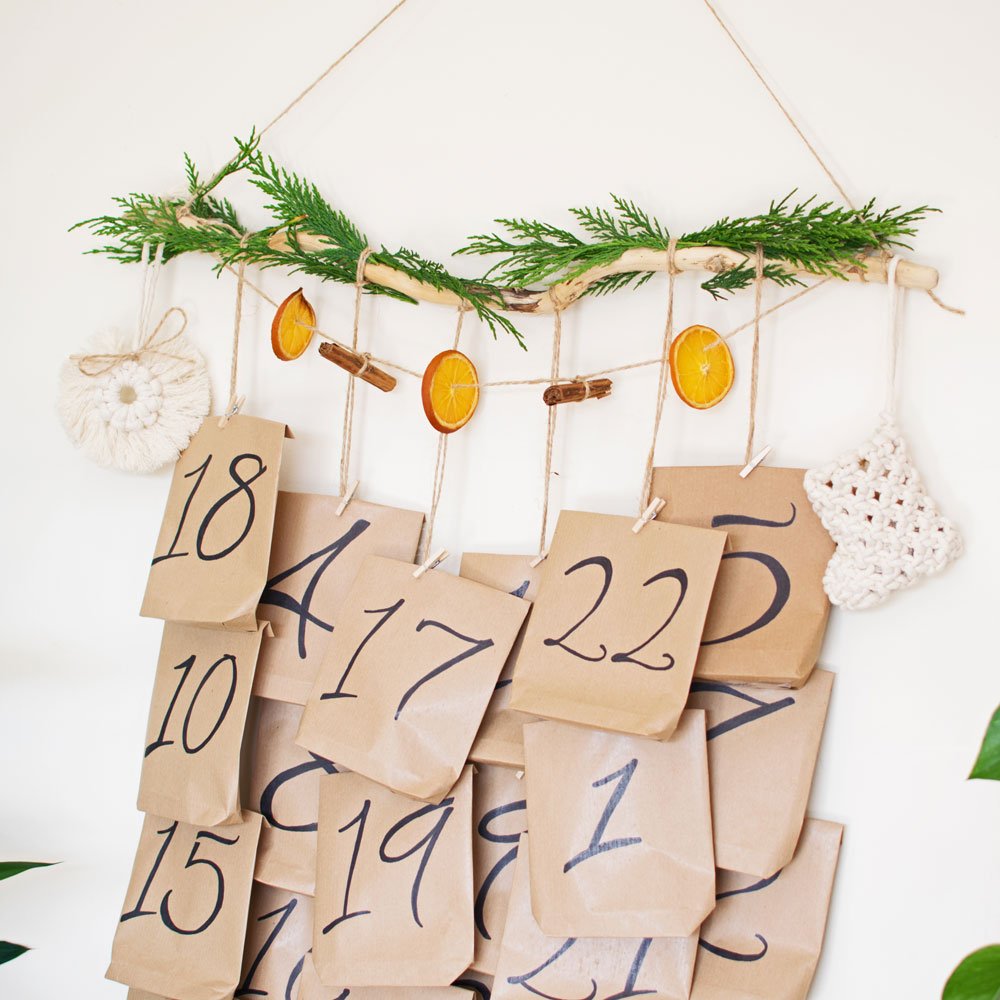
How to Make Your Own Advent Calendar (for a Sustainable Rustic Christmas).

I always find that the run up to Christmas is the most enjoyable part of the festive period…
…as opposed to that single day that goes by too quickly.
Having the whole family involved in decorating and being able to make Christmas crafts together is an experience like no other. It’s a lot of fun getting those creative juices flowing. Especially when it comes to making your own advent calendar.
Extending the gift opening for an extra 24 days is going to make December even more exciting. This is because you were the one in control of those gifts.
So, here’s a step by step tutorial for you to create your own advent calendar.
Materials
Brown kraft paper (or speed things up and use pre made bags/envelopes)
Scissors
Measuring tape/ruler
Pencil
Black marker pen
Tape
Sprigs of Greenery
Dried Oranges
Cinnamon Sticks
Jute twine/cotton string
Mini wooden pegs
Branch (or you can use a wooden dowel)
Christmas Ornaments
Step 1 - Make 24 bags

Feel free to skip this step if you don't need to make them.
Measure out 23cm (9”) by 16cm (6.3”) and use a pencil to mark this out on your kraft paper. These measurements will depend on how big you want the bags. The bags are relatively large and can fit decent sized small gifts in. Gifts you may usually use as stocking fillers.
Cut the paper. Start with one first to see if it’s an appropriate size for your gifts. If not, adjust the measurements accordingly and repeat 23 times.
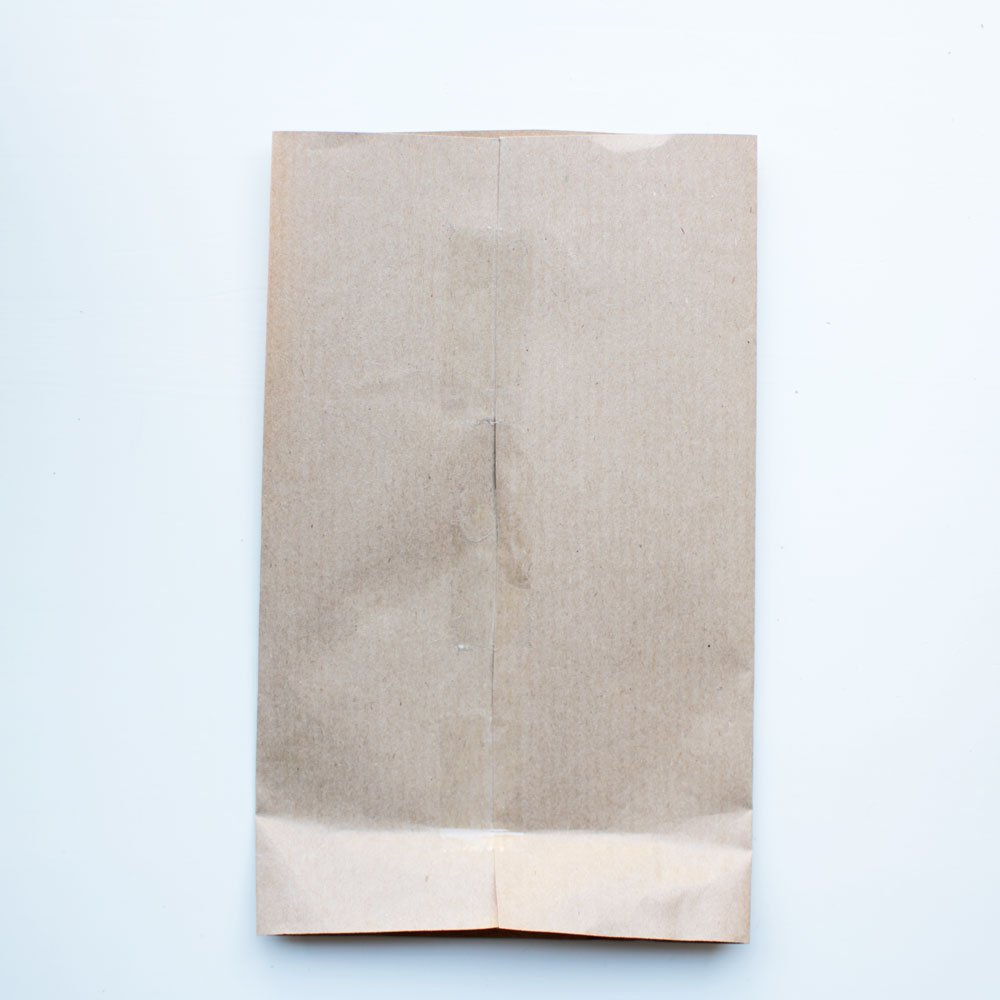
Next, fold the paper in half and tape the ends together.
On the taped side, push the bottom end upwards towards the tape. Then fold down the edges where the crease is at the side of the bag on both ends (see photos for further help).
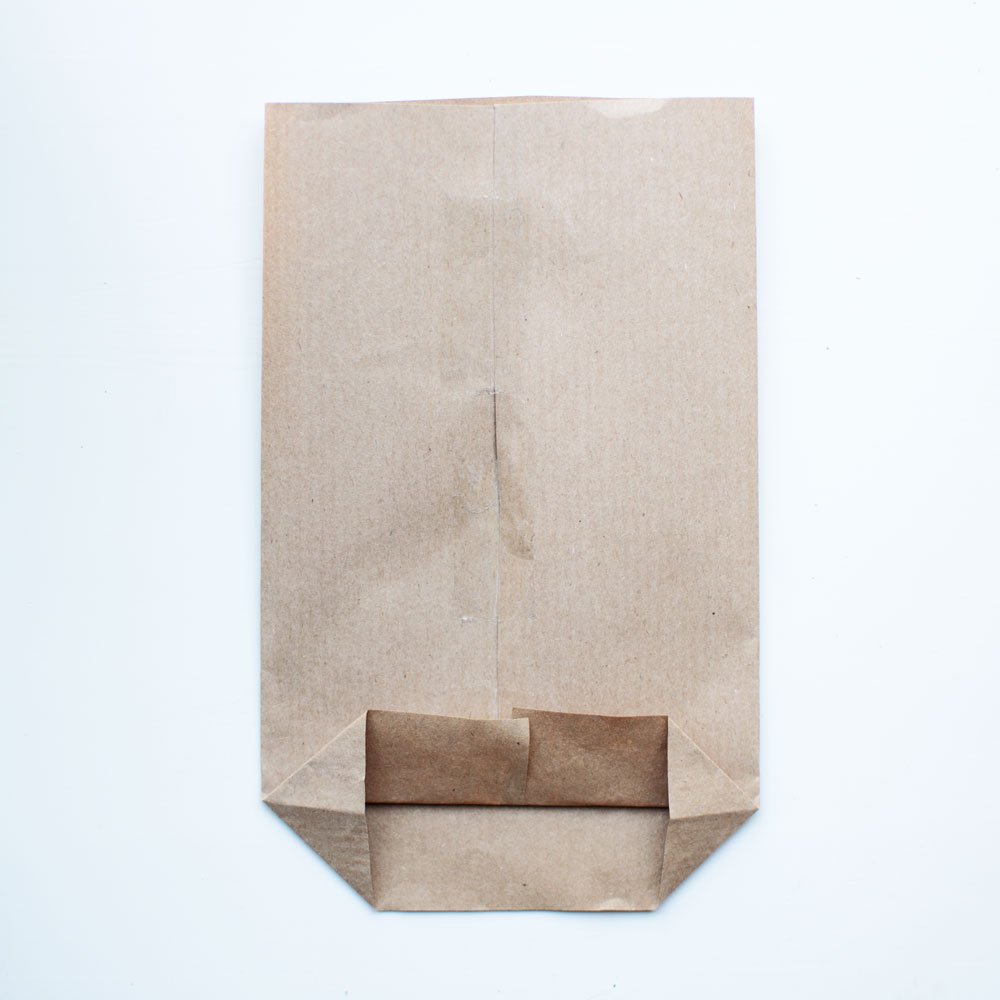
Fold down the top and bottom paper flaps towards the middle section and seal it off with tape.
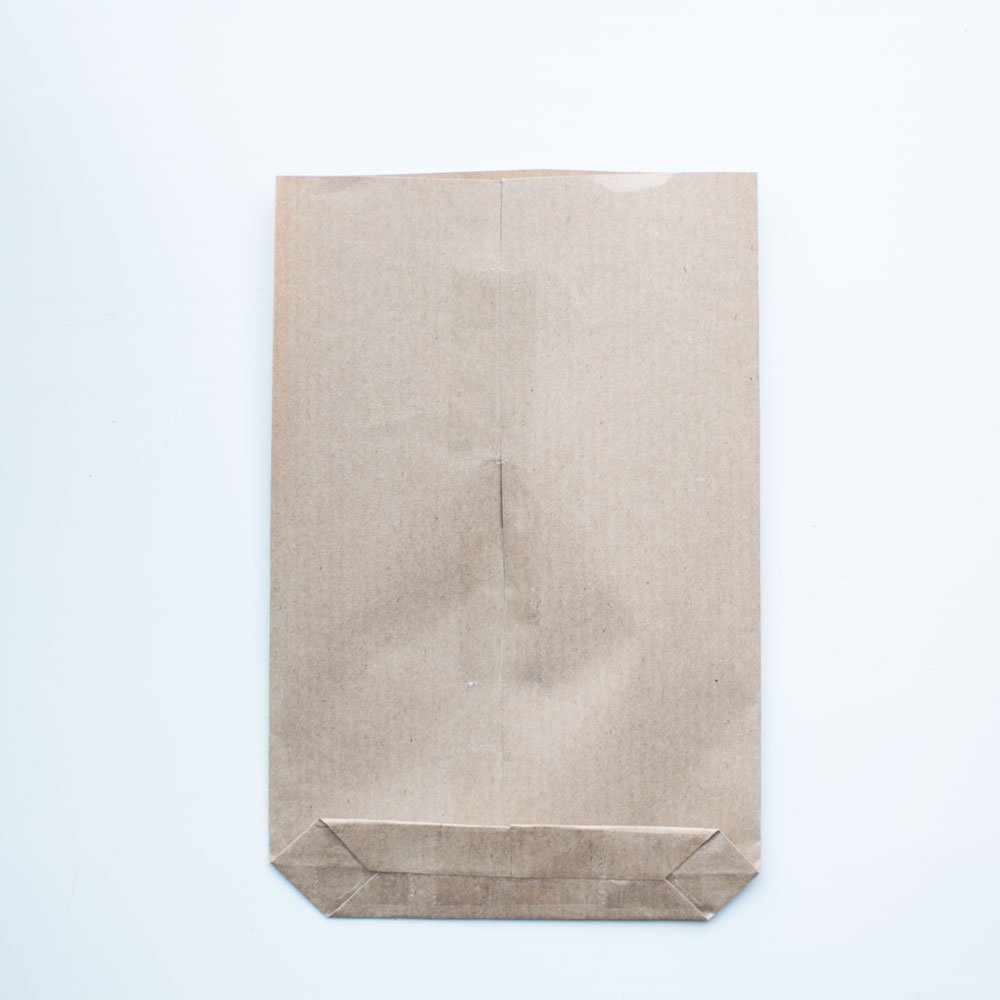
This creates the bottom of the bag. Put your hand inside to open it up and shape out the bag.
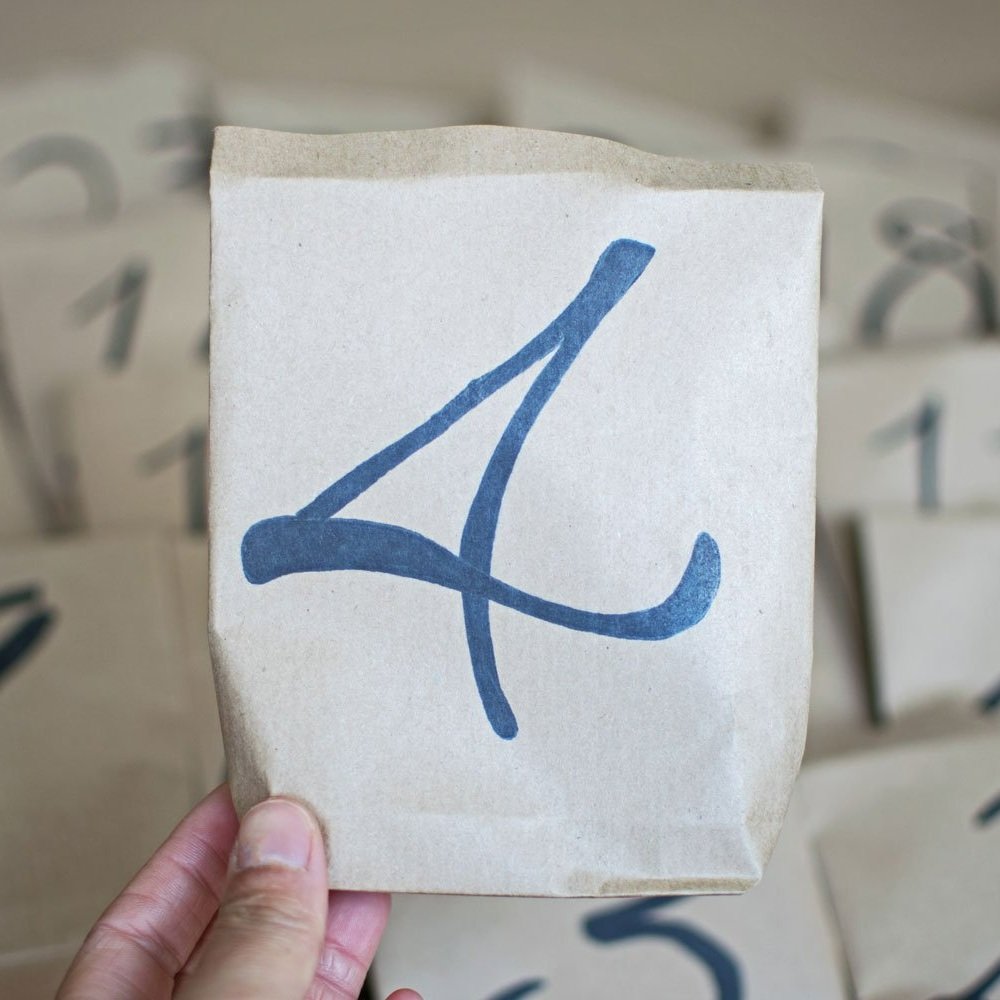
Fold about 2cm (0.8”) of the top of the bag. This will allow you to know how much space you have for writing out the numbers.
Use a black marker pen to write the numbers on or you can print out the numbers instead to save on time.

Step 2 - Make the hanging
I would recommend using driftwood found at beaches. If that’s not possible you can use any stick that’s lying around in your garden. Just ensure it’s clean and dry before using it.
Or you can use a wooden dowel which will allow you to easily get an accurate length of your hanger. Cut the dowel to the length that you desire. The driftwood I used in this tutorial measures approximately 56cm (22”) in length.
Measure out 6x 1.5m (59”) lengths of jute twine or any string that you can find in your drawers and fold the twine in half.
At the folded end, wrap the loop over the stick and feed the twine through the loop to attach it to the stick.
Repeat for the rest of the twine. Space each one out according to the length of your stick.
Step 3 - Make the garland

I used cinnamon sticks and dried oranges for the garland, but you can use whichever festive additions you like. I went for those two as it adds a gorgeous scent to the calendar.
Measure out another piece of twine. The length will depend on the hanger length so do a visual measure first before you cut it. I would recommend cutting more than you think you need, so you can adjust the position of the garland to your liking.
Feed the twine through the middle of the orange slices and tie on the cinnamon sticks. Alternate each one.
Now it’s time to attach the garland to the hanger. Tie each end onto the stick so the garland sits just below the hanger.
Step 4 - Attach the bags
Fill each bag with a gift of your choice. *
Use wooden pegs to attach them onto the string. I attached 4 bags per string.
If you don’t have wooden pegs you can use a hole puncher to make a hole at the top of the bag. The section that's folded over and tie each one onto the string.
* Advent filler ideas:
Mini bottles of alcohol
Tiny bags of coffee beans
Mini plant hanger car charms
Small candles/wax melts
Personalised keyrings
Eco friendly soaps
A variety of your/their favourite chocolates
Unique Christmas ornaments
Bamboo socks
The list is endless so have fun with this step!
Step 5 - Add your decorations
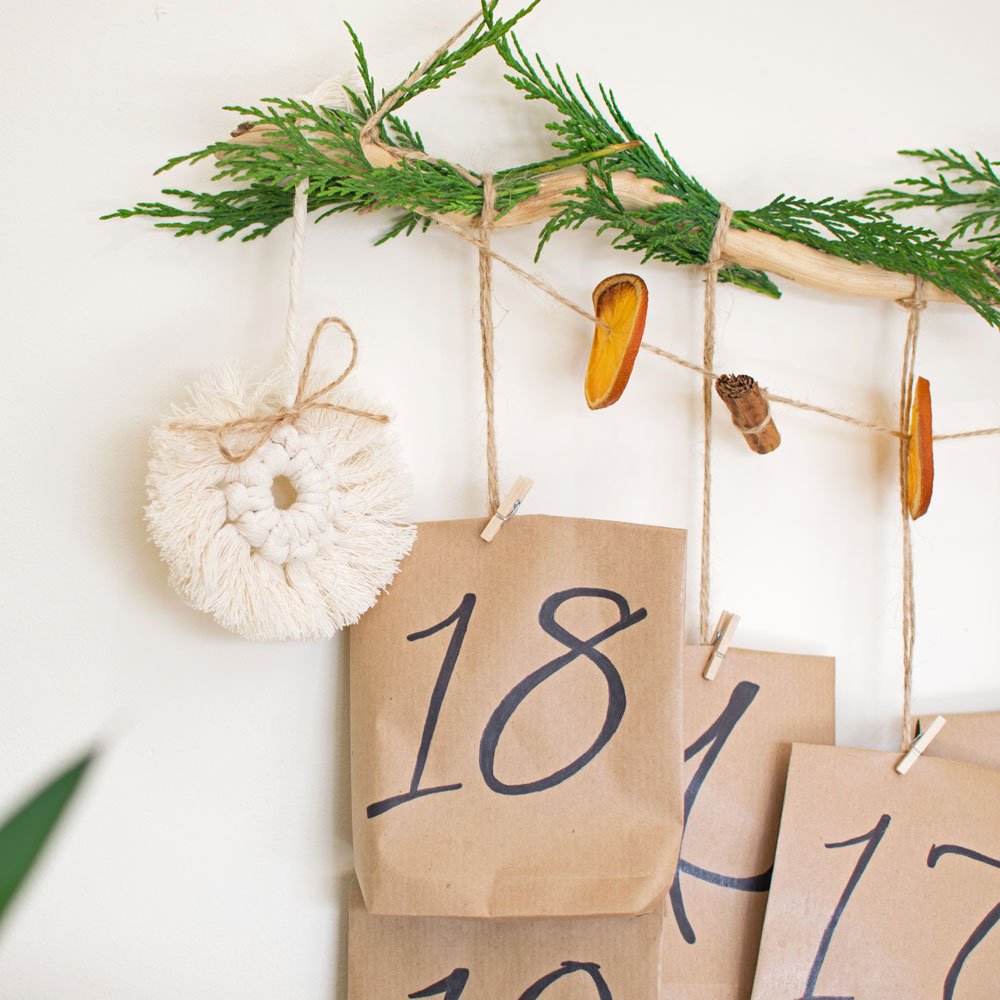

I cut some sprigs from the hedge in my garden, but you can use anything you like such as some dried fruit foliage. Slip the greenery through the hanger strings to keep it in place. Feel free to use more twine if it needs it.
I finished mine off with some Boho Christmas Ornaments. A macrame wreath and a mini Christmas stocking. I placed them at each end of the hanger to balance it out for an extra special handmade, festive touch. Which also adds to those hygge Christmas vibes.
Feel free to get as creative as you like with your finishing touches!

And there you have it.
Congratulations on creating your very own advent calendar.
The best thing about it is that it uses all natural materials that you can reuse or recycle. Making it a more sustainable alternative to the usual ones that are available to buy. Bonus points if you can fill it with unique, eco friendly gifts!
I hope you enjoyed making it and I hope you or your loved ones enjoys opening each gift bag this Christmas.
Have you tried this tutorial yet? How did it go? Let me know in the comments below.
If you’d prefer to save this tutorial for later and have easy access to it, you can download a FREE copy of it here.